In this tutorial, we'll walk you through where and how to find the Cal.com API, which you'll need to connect your calendar with your AI receptionist. You'll learn the steps to locate the API key and integrate it seamlessly, ensuring smooth scheduling and appointment management.
Creation Date: Mar 21, 2025
Created By: Alexandra Fojas
This is a free account. There's no need to sign up to a paid account unless you'd like to expand it's use.

You have two options. One is Sign Up with Google - you may use this if you're going to integrate with your Google Calendar. You may also integrate with Apple Calendar or Outlook Calendar. In that case, choose Sign up with Email.

The system will Automatically fill out the areas below but you have the option to edit them.
Edit the username to your liking and add you Full Name.

Please make sure that your time zone matches your business' time and AI Front Desk. This is an important step to ensure that your AI gets to book the correct schedules.

To forward to the next step, please click the next step.

It will auto-populate the calendar from your email address but it will also give options to include teammates. Our advice is to keep it in one calendar per user.
Once done, click continue.

It depends on the app that you use. This would set the calendar's default app. This is important because it would set the location for your meetings.
Once done, click on next steps.

You can toggle which days your business is working. It also includes the times that you are taking office.
For example, if you'd like a 9-5 schedule on Mondays to Thursday and 9-3 on a Friday, you can do so.
Another option is if you have broken schedule. You can click on the + button and add a different schedule.
For example you only take appointments from 8am - 11am and 2pm to 5pm, you can do so.

It will not affect the integration, but if you'd like to fully utilize cal.com, it might is necessary. Once done, click "Finish."

Click on new and create an event.


To edit your event, click on the 3 dots at the side of the event.
The toggle is to hide it in case you'll not be using it.

It should match the event that you have on your receptionist.

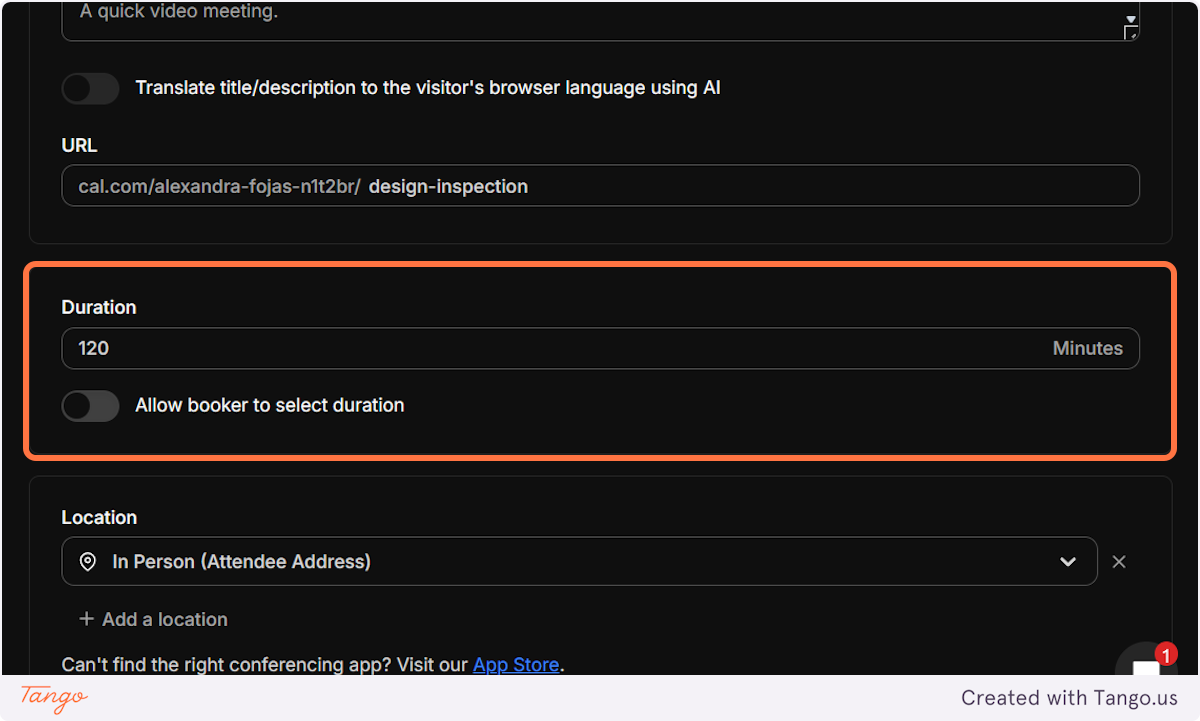
Make sure that the minutes match the number of minutes in your schedule. This is to make sure that AI can find available slots in your calendar.

Please be specific in what the location your meeting is going to be. If it's a visit, make sure to choose the In Person meeting. It will affect what message your client is going to receive.


Look for the settings button at the left hand panel. It's the second to the last option.

API keys is at the left panel after you click on "Settings." It's under the Developer tab.

Click on the add button to add your API key.
Note: Remember to keep your API key because you cannot reissue them.

Write down a name for your API key. Next is to make sure you toggle the "never expires" button. This is too avoid having to reconnect it to your receptionist.
Click on "Save" once you're done.

Copy your API and save it by clicking the copy button at the end of the link.
Take note that this link should never expire and should be kept as it cannot be edited or reissued.

Start your free trial for My AI Front Desk today, it takes minutes to setup!


